You must also have Java installed on your computer
Nengo will run faster if you also have Python installed along with the NumPy and SciPy libraries. Versions of these for Windows can be found in the windows directory
To run Nengo, either:
Double-click on nengo.bat (in Windows)
run ./nengo (in OS X and Linux)
Creating Networks
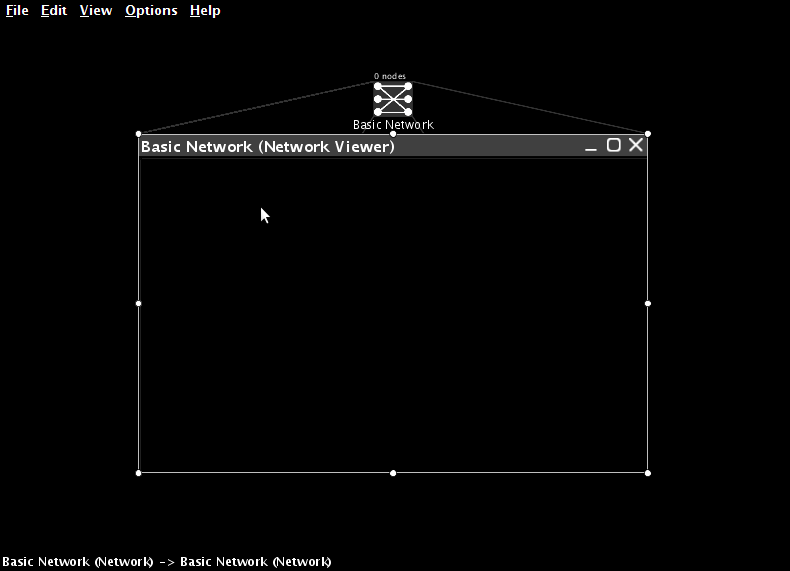
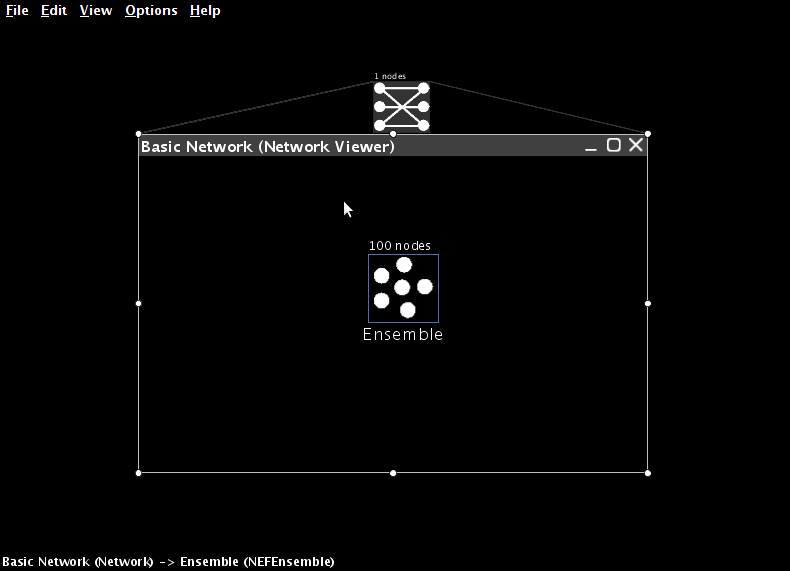
When creating an NEF model, the first step is to create a Network. This will contain all of the neural ensembles and any needed inputs to the system.
File->New Network
Give the network a name
You can create networks inside of other networks. This can be useful for hierarchical organization of models.
Creating an Ensemble
Ensembles must be placed inside networks in order to be used
Right-click inside a network
Create New->NEF Ensemble
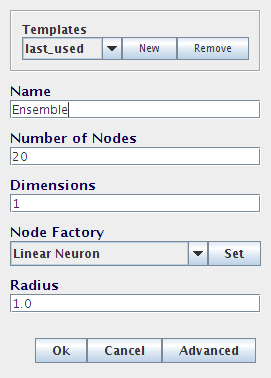
Here the basic features of the ensemble can be configured
Name
Number of nodes (i.e. neurons)
Dimensions (the number of values in the vector encoded by these neurons; leave at 1 for now)
Radius (the range of values that can be encoded; for example, a value of 100 means the ensemble can encode numbers between -100 and 100)
Node Factory (the type of neuron to use)
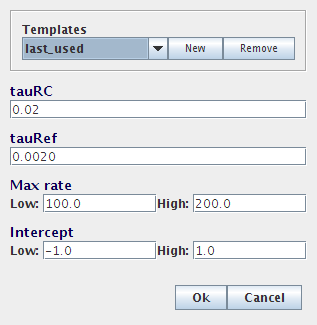
For this tutorial (and for the majority of our research), we use LIF Neuron, the standard Leaky-Integrate-and-Fire neuron. Clicking on Set allows for the neuron parameters to be configured
tauRC (RC time constant for the neuron membrane; usually 0.02)
tauRef (absolute refractory period for the neuron; usually 0.002)
Max rate (the maximum firing rate for the neurons; each neuron will have a maximum firing rate chosen from a uniform distribution between low and high)
Intercept (the range of possible x-intercepts on the tuning curve graph; normally set to -1 and 1)
Because there are many parameters to set and we often choose similar values, Nengo will remember your previous settings. Also, you can save templates by setting up the parameters as you like them and clicking on New in the Templates box. You will then be able to go back to these settings by choosing the template from the drop-down box.
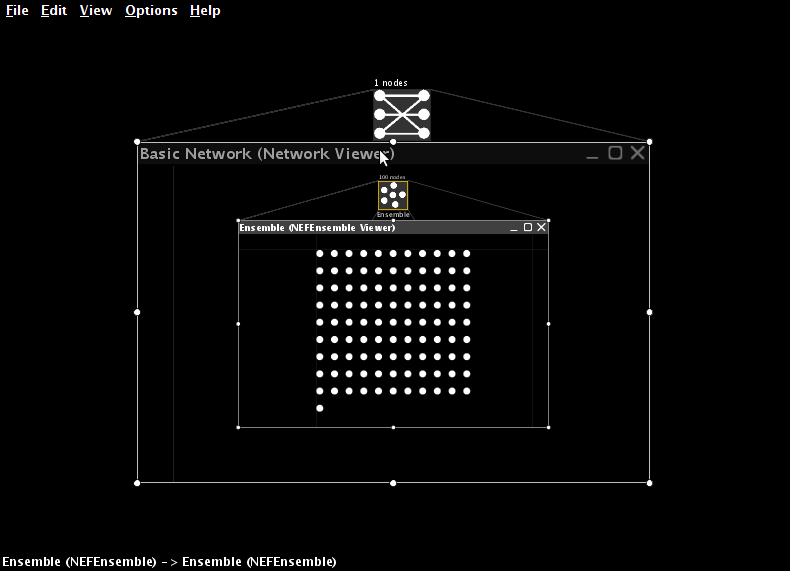
You can double-click on an ensemble to view the individual neurons within it
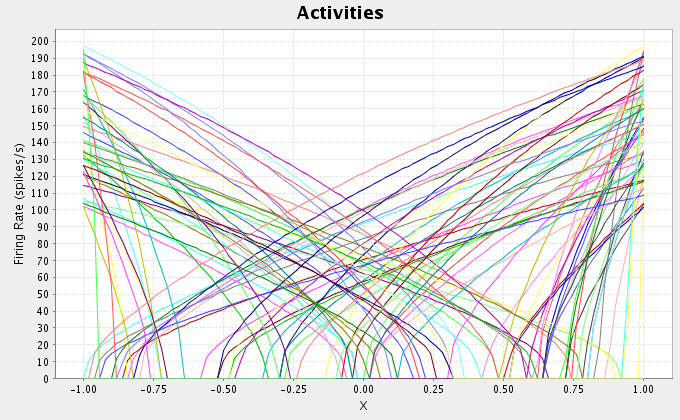
Plotting Tuning Curves
This shows the behaviour of each neuron when it is representing different values (i.e. the tuning curves for the neurons)
Right-click on the ensemble, select Plot->Constant Rate Responses
tauRC affects the linearity of the neurons (smaller values are more linear)
Max rate affects the height of the curves at the left and right sides
Intercept affects where the curves hit the x-axis (i.e. the value where the neuron starts firing)
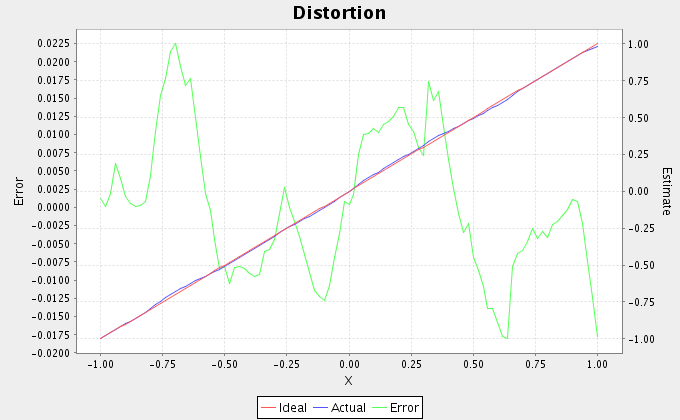
Plotting Representation Error
We often want to determine the accuracy of a neural ensemble.
Right-click on the ensemble, select Plot->Plot Distortion:X
Mean Squared Error (MSE) is also shown (at the top)
MSE decreases as the square of the number of neurons (so RMSE is proportional to 1/N)
Can also affect representation accuracy by adjusting the range of intercepts. This will cause the system to be more accurate in the middle of the range and less accurate at the edges.
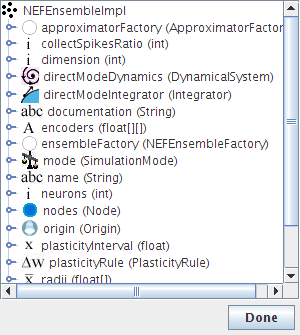
Adjusting an Ensemble
After an ensemble is created, we can inspect and modify many of its parameters
Right-click on an ensemble and select Configure
neurons (number of neurons; this will rebuild the whole ensemble)
radii (the range of values that can be encoded; can be different for different dimensions)
encoders (preferred direction vectors for each neuron)
The Script Console
Nengo also allows users to interact with the model via a scripting interface using the Python language. This can be useful for writing scripts to create components of models that you use often.
You can also use it to inspect and modify various aspects of the model.
Press Ctrl-P or choose View->Toggle Script Console to show the script interface
The full flexibility of the Python programming language is available in this console. It interfaces to the underlying Java code of the simulation using Jython, making all Java methods available.
If you click on an object in the GUI (so that it is highlighted in yellow), this same object is available by the name "that" in the script console.
Click on an ensemble
Open the script console
type "print that.neurons"
type "that.neurons=50"
You can also run scripts by typing "run [scriptname.py]"