This reference sheet gathers some extra information that may be useful for more advanced users of Nengo 1.4 (not the latest, Nengo 2.0). Specifically, there is information on: - User- defined functions - Function inputs (defining a wide variety of functions to drive a network) - More precise control over tuning curves (with preferred direction vectors)
User-defined functions
- When creating a function input or defining the function being computed by a decoded origin, you can type in standard expressions for the function.
- For function inputs, the variable you write the function over is always x0, which is time.
- For decoded terminations, you can have multi-dimensional functions, and the variables are x0, x1, ...
- The syntax is typical: +,-,*,/, cos, sin, ln, exp, sqrt, max, and others. The list of all functions registered to the parser is provided when you first create a function input of type 'user-defined function' in the pull-down menu.
Function inputs
For most situations, we want to define inputs that change over time. Here we are basing the example on the network constructed in the Building a Feedforward network (Part 2) tutorial. The methods are the same for all networks.
- For many common types of inputs, we can use the Configure interface.
- Right-click on the second function input in the model and select Configure.
- Go to functions->Constant function
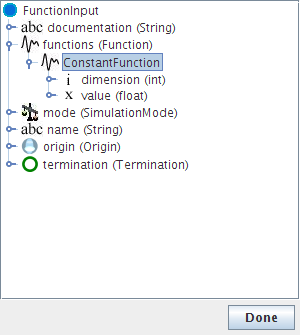
- Right-click on Constant function and choose Replace
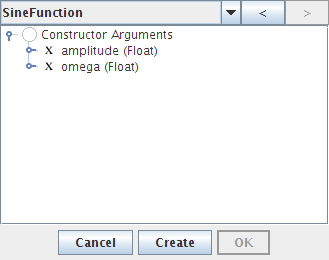
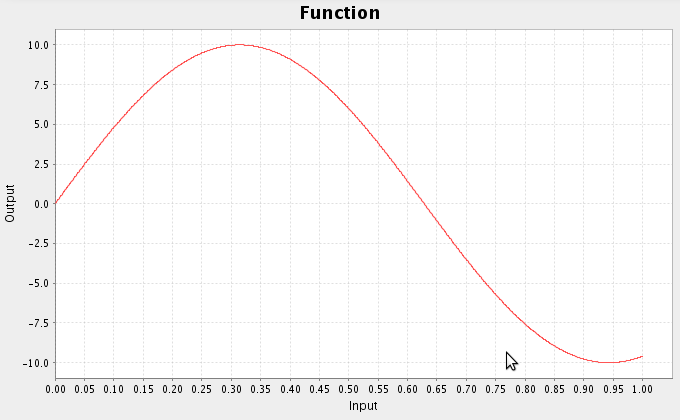
- Use the drop-down box to select SineFunction
- Press the right-arrow button twice to see the constructor that allows you to set amplitude and omega (frequency)
- Double-click on amplitude and set it to 10
- Double-click on omega and set it to 5
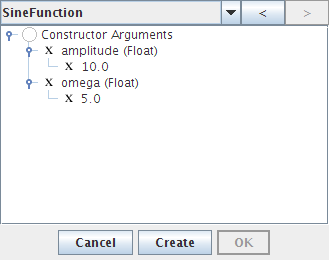
- Click on Create, OK, and Done.
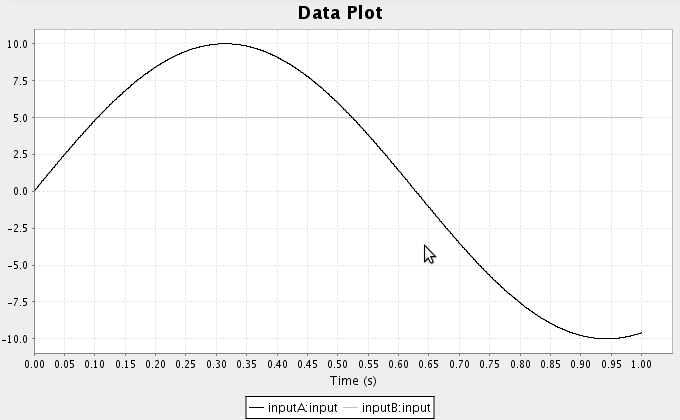
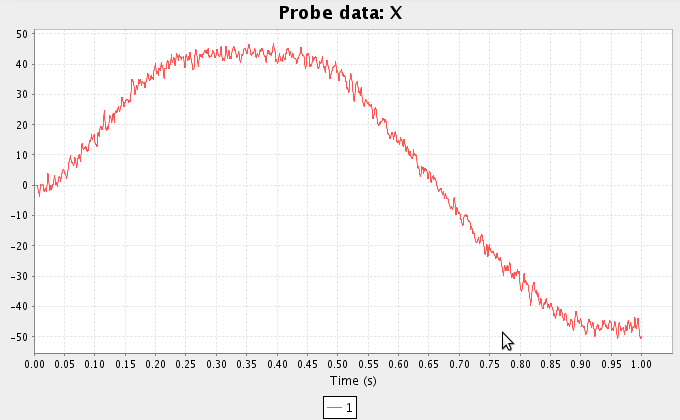
- Run the simulation and plot the result. You may also wish to add probes for the two function inputs.
- We can also create functions using the script console
- Click on an function input so that it is highlighted in yellow.
- Press Ctrl-P to go to the script console
- Enter the following command:
that.functions=[ca.nengo.math.impl.SineFunction(amplitude=10,omega=5)]
- This creates the same function as done through the GUI above
- There are a variety of other functions available
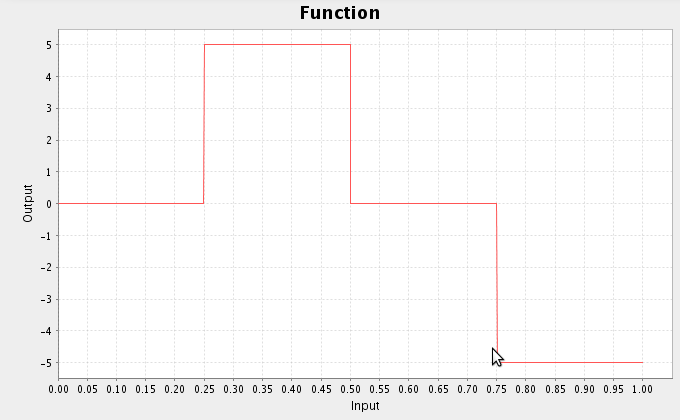
ca.nengo.math.impl.PiecewiseConstantFunction([0.25,0.5,0.75],[0,5,0,-5])
ca.nengo.math.impl.LinearCurveFitter.InterpolatedFunction([0,0.2,0.4,0.6,0.7
,1.0],[0,5,4,0,-2,0])

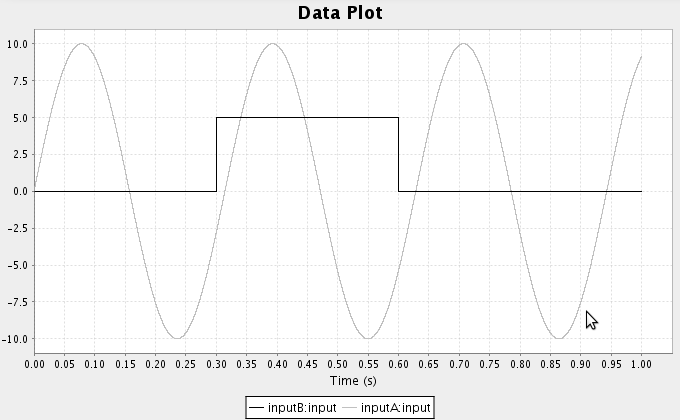
- For example, consider multiplying the following two functions together
- Select the first function input, go to the script console, and enter
that.functions=[ca.nengo.math.impl.PiecewiseConstantFunction([0.3,0.6],[0,5,
0])]
- Select the second function input, go to the script console, and enter
that.functions=[ca.nengo.math.impl.SineFunction(amplitude=10,omega=20)]
- Run the simulation and plot the inputs and results

- You can also define your own functions using Python code
- Since this will involve a few lines of code, we can use the script editor (or any text editor)
- Go to View->Open Script Editor
- Choose File->Open->myfunction.py
class MyFunction(ca.nengo.math.impl.AbstractFunction): def map(self,x): t=x[0] if t<0.2: return 0 return -30_t_t+20*t - This is a basic definition of a Python class inherting from AbstractFunction. It defines the function that is 0 for t<0.2 and -30t2+20t otherwise.
- To use this, close the script editor and return to the script console
- type ârun myfunction.pyâ. This will define the new class. We can now use it in the same way as the other functions.
that.functions=[MyFunction(1)] 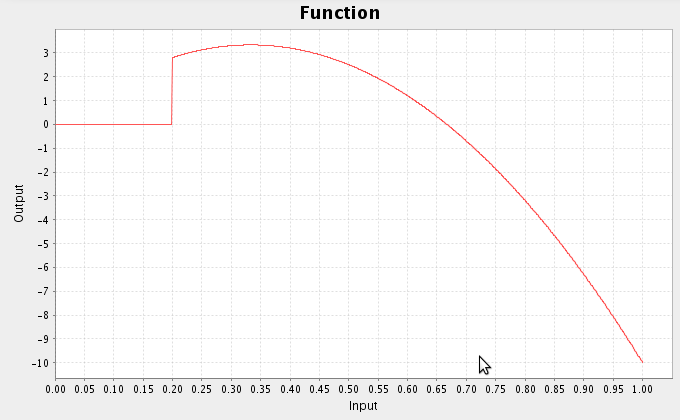
Setting preferred direction vectors
The preferred direction vectors (a.k.a. encoding vectors) for ensembles are normally randomly chosen from a unit sphere. We may wish to configure these to be more consistent with known neural properties.
- The easiest way to set preferred direction vectors is to click on the 'Advanced' tab when creating a population of neurons. Changing the 'Encoding distribution' slider determines how clustered neurons are along the dimensions of the vector space being represented.
- More fine grained control of encoders can be done with a script or with the script console.
- The following code allows us to explicitly specify encoding vectors. This assumes that you have constructed a population of 200 2-dimensional neurons, and it is selected.
` import random
class MyVectors(ca.nengo.util.VectorGenerator): def
genVectors(self,number,dimensions): base=[[1,1],[1,-1],[-1,1],[-1,-1]]
vectors=[] while len(vectors) that.ensembleFactory.encoderFactory=MyVectors() that.neurons=200
- In this case, the vectors are randomly chosen from the set [1,1],[1,-1],[-1,1],[-1,-1]. This is optimal for multiplication (see the Building a Feedforward network (Part 2) tutorial).
- Note that we have to set the number of neurons so that new neurons are created using the new encoding vectors.