This demo shows a simple motor control network for a two-link arm implemented in Nengo. It emphasizes the ability to vary the simulation level of detail, and demonstrates the integration of a neural model with a physics engine.
-
Loading the demo
-
In an empty Nengo environment, go to View->Toggle script console
- In the console at the bottom of the screen enter:
run NIPSdemos/armdemo.py. -
Wait a moment as the system generates a network with all of the necessary network elements and the 3D virtual environment in Nengo.
-
Interacting with the demo
-
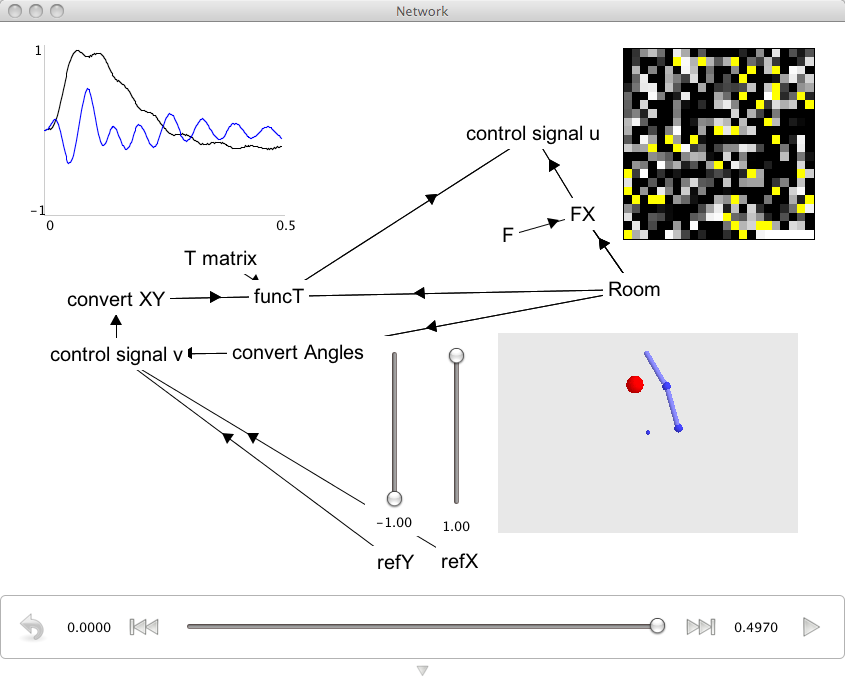
Right-click in the Network Viewer and select Interactive plots. This interface allows you to adjust aspects of the model while it is running.
- The two sliders control the input to the system, indicating the point for the arm to reach towards. The network calculates what adjustment to arm joint angles are needed to reach that target (shown as a red ball in the 3D view).
- Click play (bottom right) to see the arm move towards the target. Change the target location by adjusting the sliders.
- The grey shaded grid shows the firing rates of neurons in the output (motor) population. Observe how they change as you adjust the sliders.
-
Changing the accuracy of the simulation
-
The simulation can use spiking neurons (the default), rate neurons, or bypass neurons altogether. Press the down-arrow at the bottom of the Interactive plots window. This will reveal the configuration panel. Change the mode to direct. Neurons will no longer be used in the simulation, and the result will be directly calculated instead.
- You will see that the spike plot will stop, and that the graph will go from being noisy (due to neuron spiking effects) to being smooth.